Exploring the Amiga - Part 1
By Leonardo Giordani - Updated on
Recently I decided to give some time to retroprogramming, and in particular to explore the architecture of some famous microcomputer and consoles of the 80s and 90s. Glorious 8-bit systems like the ZX Spectrum, the Commodore 64, or the Nintendo Entertainment System. 16-bits giants the likes of the Amiga, its (eventually winning) MS-DOS-based counterparts running on the early x86 architectures, the immortal Nintendo Super Famicom and SEGA Genesis.
I am deeply convinced that learning architectures is a perfect way to become a better programmer, even now that we have 64-bits processors, fifth generation languages, and Internet. Those old systems had many limitations and to get interesting results the programmer has to know the hardware and exploit every single bit of power it can deliver.
This is sometimes not true any more nowadays. On the one hand this is good, as it allows us to concentrate on business decisions and on higher layer of abstraction. On the other hand it was and it will always be useful for a programmer to face a limited system and to try to get the maximum out of it.
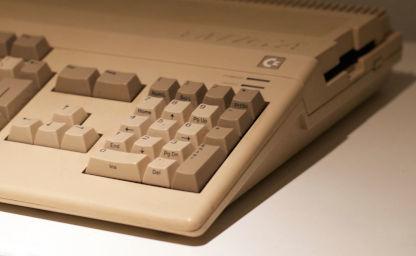
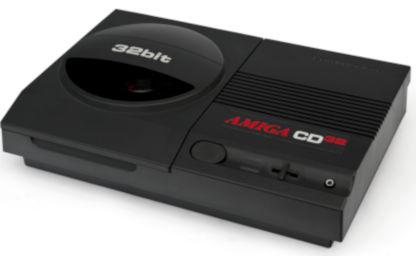
This series of posts is about the Commodore Amiga. Thousands of words have already been written on the Amiga, and I will not add anything but "milestone" to the adjectives used to describe it. This post and the following ones are not intended to be a complete and well-organised review of the architecture. Instead, they will be more a set of "lab notes" for myself that I write while I explore the platform. I put them on the blog in the hope that they will be useful for other programmers that try to crack the same problems.
Assembly language and the Amiga
If you want to write Assembly programs for the Amiga you can either work directly on a real system or use a cross-compiler. I prefer to work on my Linux system because, as much as I like retro architectures, I also like the power of a good Unix system and a modern editor.
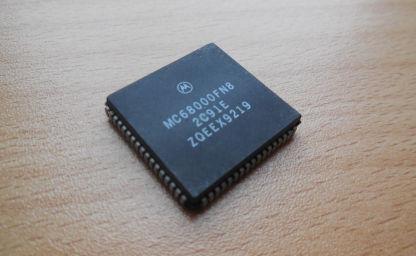
Cross-compiling is a very simple concept: instead of compiling source code and creating binaries for the architecture you are running the compiler on, you create binaries for a different architecture. In this case the host architecture is Linux/amd64 and the target architecture is Amiga.
As this is not the only project I am following at the moment, I created a directory to host everything I need for the Amiga development: compiler, documentation, scripts.
Install vasm
On Linux you can both use the GCC compiler or install vasm. The latter uses the same syntax as the standard Amiga assemblers, especially for compiler directives like macro and include, thus making it easier to pick up and use code published in books and in magazines during the 80s.
To install the latest vasm you can run the following code
wget -q "http://sun.hasenbraten.de/vasm/release/vasm.tar.gz"
tar xvf vasm.tar.gz # The file is not actually gzipped
rm vasm.tar.gz
cd vasm
make CPU=m68k SYNTAX=mot
cd ..
Install a disassembler
The vbcc suite written by Volker Barthelmann contains a disassembler for the M68k architecture that you can find here.
A disassembler is a handy tool that can reveal a lot about how a program works. You can install it with the following code
wget -q "http://sun.hasenbraten.de/~frank/projects/download/vdam68k.tar.gz"
tar xvzf vdam68k.tar.gz
cd vda/M68k/
make
which will create the executable vda/M68k/vda68k that you can use to disassemble Amiga programs or ROM dumps.
Install the NDK
The Native Development Kit (the Amiga SDK) contains include files that can be very helpful (though not strictly necessary) when developing. Unfortunately the NDK is still copyrighted by some of the guys that are trying to resurrect the Amiga. The latter idea is nice, but I really do not understand how preventing distribution of development documentation about a platform dead more than 20 years ago might help such a project.
Whatever, you can get an old version of the Amiga Developer CD here. This contains the NDK version 3.1 which is enough for what we are going to learn in this series.
You may want to rename the Includes&Libs directory to Includes_Libs to simplify its access by the compiler command line (& is a special character in bash).
Helper script and test
I created a asm.sh helper script to simplify the development process
#!/bin/bash

BASE="/where/you/put/everything"

${BASE}/vasm/vasmm68k_mot -kick1hunks -Fhunkexe -I${BASE}/NDK_3.1/Include_Libs/include_i -o ${1/.asm/} -nosym $1
Don't forget to run chmod 775 asm.sh to make the script executable. Now run the following command
echo -e "loop:\n btst #6,\$bfe001\n bne loop\n rts\n" > test.asm && ./asm.sh test.asm
This compiles a very small program that loops until you press the right mouse button. If everything has been correctly installed you should get the following output
vasm 1.8c (c) in 2002-2018 Volker Barthelmann
vasm M68k/CPU32/ColdFire cpu backend 2.3b (c) 2002-2017 Frank Wille
vasm motorola syntax module 3.11c (c) 2002-2018 Frank Wille
vasm hunk format output module 2.9b (c) 2002-2017 Frank Wille

CODE(acrx2):              12 bytes
And running the file command should return the correct type
$ file test
test: AmigaOS loadseg()ble executable/binary
LEA, the PC and the relative offset
In Assembly, you can manage memory cells using either their content or the address, as you can do with pointers in C or similar concepts in other high-level languages. You can also set labels that the assembler will convert into instruction addresses, but these are (almost) always relative to the beginning of the code itself, as the code may be loaded anywhere in memory.
This means that, generally speaking, all the addresses we use when we branch to other parts of the code should be relative to the current instruction.
The Motorola 68k calls this addressing mode Program Counter Indirect with Displacement Mode. Its description contained in the Programmer's Reference Manual is
In this mode, the operand is in memory. The address of the operand is the sum of the address in the program counter (PC) and the sign-extended 16-bit displacement integer in the extension word. The value in the PC is the address of the extension word.
(2.2.11, page 2-13)
The usual assembler syntax for this addressing mode is (d16,PC) or d16(PC), where d16 is a 16-bits displacement. The lea instruction, for example, supports this mode, so we can find code like
00000364: 41fa ffa6 lea 0x30c(pc),a0
Here the instruction is stored at address 0x0364 and it loads in the a0 register the effective address of the instruction at 0x030c.
Pay attention: since your code starts always at address 0x0, you might be tempted to store the value 0x030c into a0 and go on. You want however to load the address that instruction has at runtime, which will be different from the current one. The displacement, however, will be the same, as the code doesn't change its form, and this is why this addressing mode is useful.
Relative offset encoding
A question may arise, then: why does the code show the address 0x30c, which is the effective address, if the displacement is relative?
In the example, the syntax 0x30c(pc) doesn't mean "the line at 0x30c from the current line", but "the line at 0x30c considering that the current line is 0x0364". Let's dig into the binary representation of the instruction to see how the processor receives it. The value 0x41faffa6 in binary form is
01000001111110101111111110100110
If we split it according to the Motorola 68k opcodes scheme (Programmer's Reference Manual, Section 8) we get
0100 000 111 111010 1111111110100110
^    ^       ^
lea  a0      (d16,PC)
So we know this is a lea to a0 using Program Counter with Displacement. The address argument is 1111111110100110, which has to be interpreted as a "sign-extended 16-bit displacement integer" as the Reference Manual stated. The value is the two's complement representation of the decimal -90, and since the PC is pointing at the address itself (0x0366) the resulting address is 0x0366 - 90, which gives 0x030c.
The fact that the PC is pointing at the address might be overlooked. The manual says
The value in the PC is the address of the extension word. (2.2.11, page 2-13)
So, while the Assembly code uses the absolute value, the actual opcode contains a true displacement from the current position. The disassembler formats the value so that it is easy for us to understand the effective address (0x30c), but also telling us that there is more going on behind the scenes using the (pc)suffix.
How to open a library
When you code in a high level language like C you usually refer to functions of an external library in your code and then provide the library object files on the compiler command line. The code of the library is either included in the code of your program or loaded into memory at runtime (shared libraries), but in both cases the function call is, at the machine language level, just a jump to a different address in memory.
If you write a program directly in Assembly language things are not different, you can always rely on the linker to properly address external libraries. In a platform like Amiga, however, it's custom to access the system libraries in a direct way, manually jumping to the right address, which is why sometimes tutorials and books contain "magic numbers".
When the Amiga OS loads a library in memory the Exec master library analyses its structure and creates the so-called jump table. This is nothing more than an array that lists the addresses of the functions exposed by the library. This is a very simple and effective way to let the OS free to load the library anywhere in memory (relocation).
The Exec master library is not different, but this library is loaded as part of the bootstrap process, and the base address is always stored in memory location 0x4. To use one of Exec's functions, then, we just need to issue a jsr <address> (Jump to SubRoutine), where <address> is the current position in memory of the function we want to call. Since we don't know the absolute address, being the library dynamically loaded, we use the library's jump table to retrieve the base address and get the function address as a fixed offset from the former.
Many Amiga programmers knew (and know) the addresses by heart, which is fine since the Amiga OS promises not to change the order of the jump table among different versions of Exec. So, for example, the address of the OpenLibrary function can be found at -552 bytes before the library base address, while CloseLibrary is at -414. To call the OpenLibrary function, then, you need the following code
    move.l 4.w,a6   ; a6 = base address of Exec
    jsr -552(a6)    ; OpenLibrary()
The first instruction moves the value contained at address 0x4 into the a6 register. This way the register will contain the base address of Exec. Then it jumps to the subroutine which address is 552 bytes before that base address. So, if a6 contains an address like 0x20000 the code jumps to 0x1fdd8 (0x20000 - 552). This also shows us that the jump table is actually a proper list of jump instructionss, not just addressess.
The OpenLibrary function, however, expects some parameters, as you can see on the documentation page exec.library/OpenLibrary (here).
library = OpenLibrary(libName, version)
D0                    A1       D0
The pointer to the library name has to be in the register a1 and the minimum accepted version in d0. The code becomes
    move.l 4.w,a6        ; a6 = base address of Exec
    clr.l d0             ; 0 = accept all versions
    move.l #libname,a1   ; a1 = address of the libname string
    jsr -552(a6)         ; OpenLibrary()

libname:
    dc.b "somename.library",0
What's next
In the next article I will explore the library jump table in detail, discussing in particular the first four entries. I will also show how types and structures are defined in the Assembly include files.
Resources
- Motorola M68000 Family Programmer's Reference Manual - https://www.nxp.com/docs/en/reference-manual/M68000PRM.pdf
- AmigaOS Developer Docs
Feedback
Feel free to reach me on Twitter if you have questions. The GitHub issues page is the best place to submit corrections.
Part 1 of the Exploring the Amiga series
Related Posts
Exploring the Amiga - Part 8
Updated on
Exploring the Amiga - Part 7
Updated on

Exploring the Amiga - Part 6
Updated on
Exploring the Amiga - Part 5
Updated on
Exploring the Amiga - Part 4
Updated on
Exploring the Amiga - Part 3
Updated on
Exploring the Amiga - Part 2
Updated on